 +86-15371769898
 [email protected]
+86-15371769898[email protected]The core difference is simple: a chill roller removes heat from a material to cool, set, or solidify it, while a heating roller adds heat to soften, bond, shape, or activate it. They are often used in sequence within the same production line or treatment process — one cannot fully replace the other. Choosing the wrong roller type, or using it at the wrong stage, leads to defects, rework, and material waste. This guide breaks down exactly how each works, where each belongs, and how to decide which one your application needs.
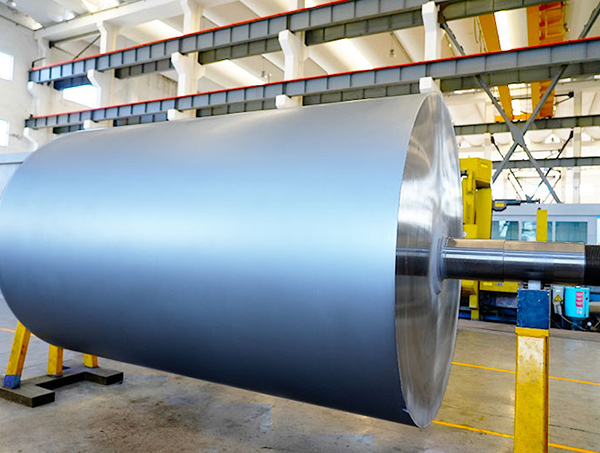
A chill roller is a temperature-controlled roller that maintains a surface temperature below ambient or below the material's solidification point, actively drawing heat away from whatever passes over or through it. In industrial settings, chill rollers are typically cooled by circulating chilled water or refrigerant through internal channels. Surface temperatures commonly range from 5°C to 25°C (41°F to 77°F), though specialized cryogenic rollers can operate below 0°C.
In personal care and wellness, chill rollers — often referred to as ice rollers or cryo rollers — are handheld tools kept in a freezer or refrigerator before use, typically reaching temperatures of 0°C to 10°C (32°F to 50°F) against the skin.
The cooling mechanism relies on conductive heat transfer: the roller surface absorbs thermal energy from the material on contact, carrying it away via the cooling medium inside. The efficiency of this transfer depends on three factors:
A heating roller adds thermal energy to a material through conductive or radiant contact. Internal heating elements — electric resistance coils, oil circulation systems, or steam channels — raise the roller surface to a target temperature above ambient. Depending on the application, surface temperatures range from 60°C to over 260°C (140°F to 500°F).
In personal care, heating rollers include hot rollers, heated curling barrels, and thermal styling tools. In manufacturing, they are central to lamination, calendering, extrusion, adhesive activation, and composite curing processes.
Heat flows from the roller surface into the material on contact. The amount of energy transferred is controlled by:
The table below summarizes the fundamental differences across the most important operational parameters:
| Parameter | Chill Roller | Heating Roller |
|---|---|---|
| Primary function | Remove heat from material | Add heat to material |
| Typical surface temp (industrial) | 5°C – 25°C (41°F – 77°F) | 60°C – 260°C (140°F – 500°F) |
| Typical surface temp (personal care) | 0°C – 10°C (32°F – 50°F) | 120°C – 210°C (250°F – 410°F) |
| Cooling / heating medium | Chilled water, refrigerant, phase-change fluid | Electric resistance, oil, steam |
| Effect on material | Solidifies, sets, shrinks, firms | Softens, bonds, activates, shapes |
| Position in process | Typically downstream / after heat treatment | Typically upstream / primary processing stage |
| Risk of misuse | Condensation, thermal shock, brittleness | Scorching, bond failure, dimensional distortion |
| Energy direction | Material → Roller (heat extraction) | Roller → Material (heat injection) |
A chill roller is the right choice whenever your goal is to rapidly and uniformly remove heat from a material to lock in its shape, prevent degradation, or prepare it for the next processing stage. Here are the primary use cases:
In plastic film manufacturing, molten polymer exits the extruder die at temperatures of 180°C–260°C (356°F–500°F). A chill roller immediately downstream quenches the film, solidifying it into a uniform sheet before it stretches unevenly or degrades. The speed of quenching directly controls film clarity and crystallinity — faster cooling produces clearer, more amorphous film. A drop in chill roller temperature from 20°C to 10°C can increase optical clarity in BOPP film by up to 15%.
After UV or thermal curing of inks and coatings, substrate temperatures can reach 60°C–90°C — hot enough to cause blocking (layers sticking together) when wound into rolls. A chill roller positioned after the curing station brings the substrate back to below 35°C before winding, preventing blocking defects and protecting color quality in the finished roll.
Rubber compounds exit mixing and calendering equipment at elevated temperatures. Without controlled cooling, the material continues to react, risking premature vulcanization (known as "scorching"). Chill rollers arrest this process, giving operators a stable, workable material with a consistent and predictable cure window.
In skincare, chill rollers constrict blood vessels on contact, reducing puffiness and redness. Studies on cryotherapy facial tools show a measurable reduction in periorbital edema (under-eye swelling) after just 2–3 minutes of cold roller application, making them particularly effective in the morning or after inflammatory skin treatments. They are also used to soothe skin post-microneedling, laser, or chemical peel procedures, where reducing inflammation quickly minimizes downtime.
After waxing or laser hair removal treatments, skin temperature rises and capillaries dilate, causing redness and sensitivity. A chill roller applied immediately after reduces surface temperature within seconds, shortening the visible redness window from 30–60 minutes down to under 10 minutes in most clients, according to esthetician clinical observations.
A heating roller is the right choice whenever your goal is to introduce controlled thermal energy into a material to change its state, activate a chemical process, or permanently reshape it. Key applications include:
Heat-activated adhesives require a minimum activation temperature — typically 80°C–160°C (176°F–320°F) — before they flow and bond. A heating roller applies this energy uniformly across the full substrate width, achieving consistent bond strength that cold-pressure lamination cannot replicate. For example, in packaging lamination, a heating roller at 120°C combined with nip pressure of 3–5 bar produces peel strengths of over 300 g/25mm — significantly higher than room-temperature pressure alone.
Heating rollers in textile calendering smooth fiber surfaces, improve sheen, and compress fabric to a target thickness. The temperature used depends on fiber type: cotton typically requires 150°C–180°C, while synthetic fabrics like polyester must stay below their glass transition temperature (around 80°C for PET) to avoid permanent deformation or melting.
Foil stamping uses a heated roller or die to transfer metallic or pigmented foil from a carrier film onto a substrate. The roller must reach a precise temperature — typically 100°C–160°C — to release the foil from its carrier without over-penetrating the substrate. Too cold and the foil does not transfer; too hot and it bleeds beyond the intended design boundary.
Heating rollers temporarily break and reform the hydrogen bonds in hair's keratin structure, allowing the hair to take a new shape as it cools. The effect is temporary — humidity and water re-break those bonds — which is why the hair must cool completely on the roller before removal. Removing a heated roller before the hair cools reduces curl retention by up to 60%, a common mistake that leads users to incorrectly blame the tool rather than the technique.
In many processes, chill rollers and heating rollers work as a pair. Neither alone achieves the final result — it is the sequence that matters. Here are three common combined-use scenarios:
| Process | Heating Roller Role | Chill Roller Role |
|---|---|---|
| Plastic Film Extrusion | Die heats polymer to melt-flow state | Quenches film to lock gauge and clarity |
| Thermal Lamination | Activates adhesive for bonding | Sets bond and prevents blocking before wind-up |
| Cosmetic Treatment (Facial) | Opens pores, boosts serum absorption | Closes pores, seals in product, reduces redness |
| Rubber Sheet Production | Calendering roller shapes and compresses compound | Cools sheet to prevent scorch before stacking |
In facial skincare routines, the hot-then-cold roller protocol is widely practiced by estheticians. A warm roller is applied first for 2–3 minutes to dilate pores and increase serum penetration, followed immediately by a chill roller for 2–3 minutes to close pores and lock in the treatment. This sequence leverages both roller types for a result that neither achieves independently.
Use the following decision framework when determining which roller type your application requires:
If your material needs to be activated, softened, shaped, or bonded — use a heating roller. If your material needs to be set, stabilized, cooled, or soothed — use a chill roller. In many real-world processes, both are needed, and the sequence matters as much as the individual roller settings.
The most common planning error is treating the two as alternatives rather than complements. A production line or treatment protocol designed around only one roller type will always be leaving performance on the table. Map your material's thermal journey from start to finish, identify where heat needs to be added and where it needs to be removed, and specify each roller accordingly.
Dedicated to developing and manufacturing various shapes of rolls with different roll structures.
Phone: +86-15371769898
Email: [email protected]
Add: 9 Lifa Avenue, Chengdong Town, Haian County, Nantong City, Jiangsu Province, China
Copyright© 2025 Jiangsu Jinhang Machinery Manufacturing Co., Ltd. All Rights Reserved.
 Custom Thin Walled Roller Manufacturers
 English
 русский
 Deutsch


